
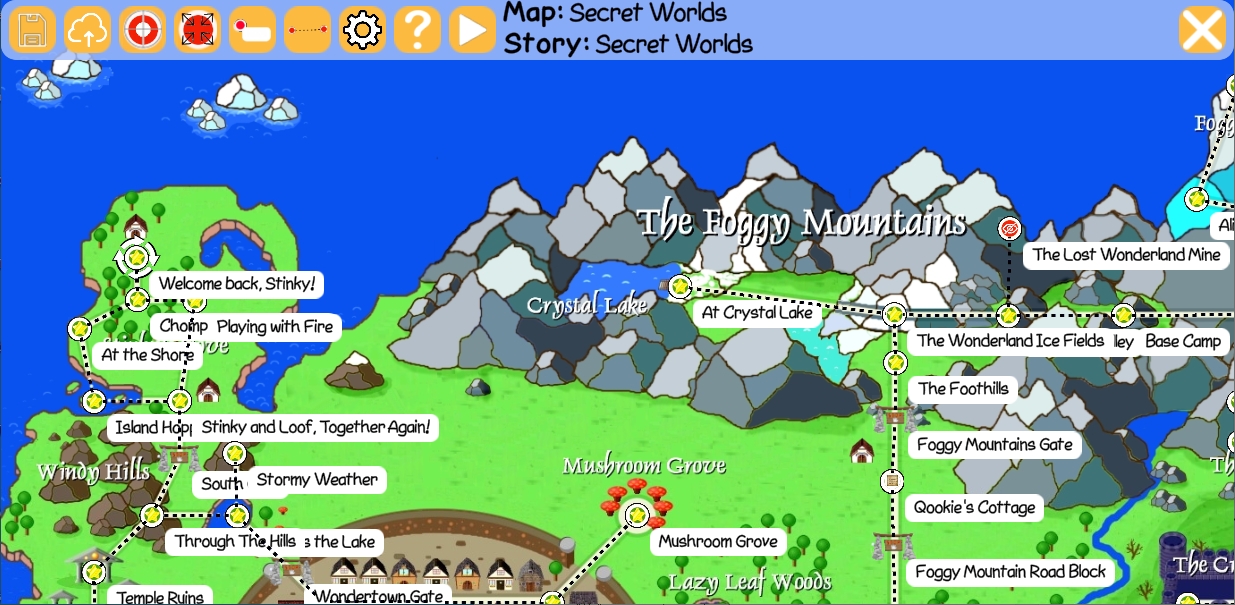
The Stinky and Loof in Wonderland Story Map Editor is part of the Level Editor available in the Steam edition of the game. It allows you to create and edit story maps similar to the Secret Worlds map. You can't edit the Secret Worlds map itself (though you can copy it to a new map), but you can create new maps from any graphic for any standard or custom story, including Secret Worlds.
A story map in Stinky and Loof in Wonderland is comprised of a graphic (any jpg or png) and a story (custom or standard). You use the Story Map Editor to select the graphic and story and then place hotspots on the map. A hotspot is a spot on the map that a player can interact with. Hotspots are associated with either a level from the map's story or a gate. Players navigate between hotspots along connections that you define with the Map Editor. Once on a hotspot, the player can play its associated level or open its gate (if the player has sufficient resources to pay the gate's toll).
You can pan and zoom the map in the Story Map Editor the same way you pan and zoom in the Level Editor (Alt or Shift+arrow; Alt or Shift+left mouse button; middle mouse button).
You can close the map and return to the Level Editor file menu by pressing Esc or clicking on the close icon (![]() ) in the upper right.
) in the upper right.
 To start the Story Map Editor, press Esc anywhere in the game and then click the Level Editor button on the pop-up Settings form.
The game displays the Level Editor File Menu, and you can start the Story Maps editor by clicking the Story Maps button on this menu.
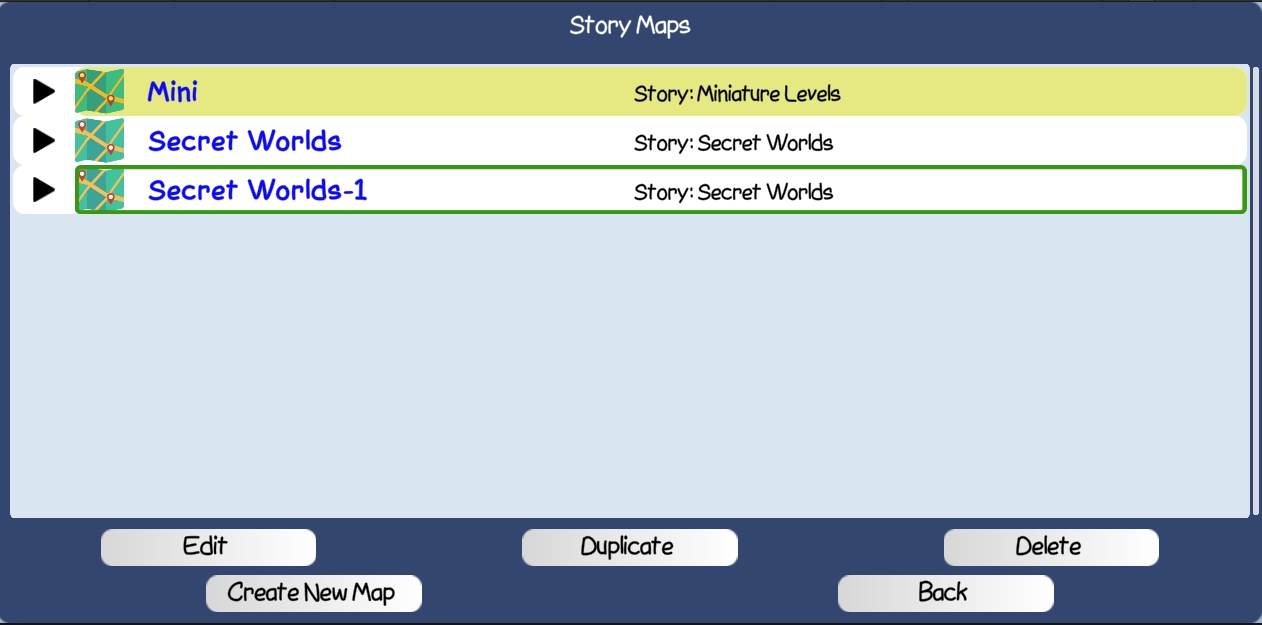
When you click this button, the game displays the Story Map Selection form shown at the right.
This form lists all maps in the game, including the Secret Worlds map. The game draws a green outline around the currently selected map. You can change the selection by
single-clicking another map, or by using the tab or arrow keys to highlight a different map and then pressing Enter to select it.
To start the Story Map Editor, press Esc anywhere in the game and then click the Level Editor button on the pop-up Settings form.
The game displays the Level Editor File Menu, and you can start the Story Maps editor by clicking the Story Maps button on this menu.
When you click this button, the game displays the Story Map Selection form shown at the right.
This form lists all maps in the game, including the Secret Worlds map. The game draws a green outline around the currently selected map. You can change the selection by
single-clicking another map, or by using the tab or arrow keys to highlight a different map and then pressing Enter to select it.
Once you've selected the map you want to work with, select an action by clicking one of the buttons at the bottom of the screen:
| Open the Story Map Editor to edit the selected map. This is the default action that's taken if you double-click a map, or press Enter when the selected map is highlighted in yellow. Note that the Edit button is disabled for the standard Secret Worlds map. | |
| Duplicate the selected map, including its graphic and all hotspots. The game gives the new map the same name as the original, followed by "-1". You can change this name using the Settings form in the Story Map Editor. | |
| Delete the selected map. The game pops up a confirmation message asking if you really want to delete. If you select "Delete" on the confirmation popup, the map is deleted and cannot be recovered. The Delete button is disabled for the standard Secret Worlds map. | |
| Open the Story Map Editor to create a new map from scratch. The game opens the Story Map Editor with the Map Settings form displayed so that you can specify a name and description for the map, upload its graphic, and specify its associated story. | |
| Returns to the Level Editor File menu. |
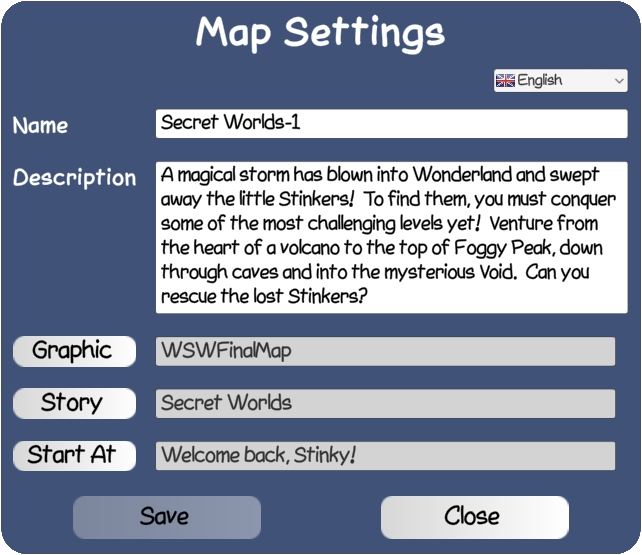
The Map Settings form displays and supports updating global map settings. It is the first form displayed when you
begin creating a new map, and must be filled out completely before you can edit the map. Once you've begun editing
a map, you can display Map Settings again by clicking the Settings icon (![]() )
in the toolbar.
)
in the toolbar.
| Field | Description |
|---|---|
| Language | The Language dropdown in the upper right of the Map Settings form specifies the language of both the settings on this form and the map itself. You can switch betwwen languages by selecting the desired language in the dropdown and then updating text fields. When you close the Settings form, the map and associated hotspots are displayed and edited in the selected language. |
| Name | The name of the map. This is the name shown to players on the Story Selection form. |
| Description | A description of the map. This is shown to players on the Story Selection form. |
| Graphic | The graphic (jpg or png) that comprises the map. Clicking the Graphic button pops up a File Explorer window allowing you to select the map's graphic. Once you select a graphic, it is shown behind the Settings dialog. Selecting a new graphic does not delete or move any hotspots. |
| Story | The story associated with the map. Clicking the Story button shows the Story Selection form allowing you to select any standard or custom story to associate with the map. You can use any or all levels from the selected story in the map. |
| Start At | The hotspot where a player begins the first time they play on a map. Press the Start At button pops up a list of the map's
hotspots allowing you to select the one where new players should start. The editor marks the starting hotspot with
This field is not available for a new map. The editor automatically sets the starting hotspot of a new map to the first hotspot you define. You can use the Settings form at any time to change this. |
The toolbar is a row of orange buttons at the top of the screen that either invoke Story Map Editor function or toggle a setting.

A hotspot is a spot on the map that a player can interact with. You can place hotspots anywhere on the map by clicking on the desired location while the hotspot cursor is active. You can also edit an existing hotspot by clicking on it. The cursor changes to an arrow when it's over an existing hotspot.
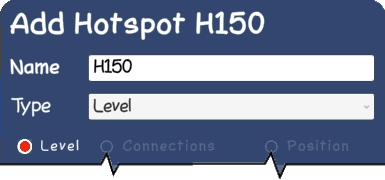
Placing a new hotspot or clicking on an existing hotspot pops up the Hotspot Editor form. The top half of the form specifies the name and type of the hotspot:
| Field | Description |
|---|---|
| Name |
The name of the hotspot. The default value is "H" followed by a three-digit number. If you leave the default,
the Editor automatically changes it to the level name when you select a level for the hotspot. You can change the
name as desired, but letting it default to level name usually works best. The hotspot name is shown to the player when they hover the cursor over the hotspot. |
| Type |
The type of hotspot. There are three possible types:
|
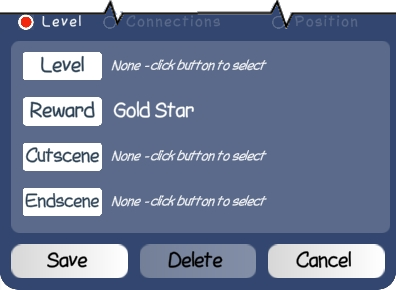
The Level tab is available for hotspots of type Level or Secret Level.
| Field | Description |
|---|---|
| Level | The level associated with this hotspot. Clicking the Level button pops up a Level Selection form for the story associated with the hotspot, with levels already selected greyed out (a level can only appear on at most one hotspot). Click on a level to select it for the hotspot and return to the Hotspot Editor. |
| Reward |
The reward given to the player when they successfully complete the level associated with the hotspot. There are six standard rewards:
|
| Cutscene | The cutscene associated with the hotspot. The game displays the cutscene before starting the level when the player selects the hotspot. Pressing the Cutscene button pops up a list of cutscenes. Click on the desired cutscene to select it for the hotspot, or use the Add New button on this form to create a new custom cutscene. See Creating Custom Cutscenes for more. |
| Endscene | The endscene associated with the hotspot. The game displays the endscene when the player completes the level associated with the hotspot. Pressing the Endscene button pops up a list of cutscenes. Click on the desired cutscene to select it for the hotspot, or use the Add New button on this form to create a new custom cutscene. See Creating Custom Cutscenes for more. |
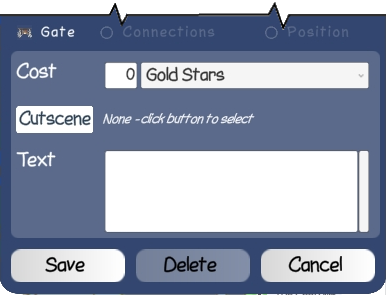
The Gate tab is available for hotspots of type Gate.
| Field | Description |
|---|---|
| Cost | The toll associated with the gate. In order to pass the gate, the player must pay a toll of the amount and type of the reward shown. Use the dropdown to select the type of reward needed for the gate's toll, which can be gold stars, rainbow stars, Forest Map, Peegue's Pass, or Quookie's Map. Enter the number of instances of the reward needed for the toll to the left of the dropdown. Note the value must be one for a reward type other than a star. |
| Cutscene | The cutscene associated with the gate. The game displays the cutscene when the player arrives at the gate. Pressing the Cutscene button displays a list of cutscenes suitable for a gate. Click on the desired cutscene to select it for the gate, or use the Add New button on this form to create a new custom cutscene. See Creating Custom Cutscenes for more. |
| Text | The text displayed to the player when they arrive at the gate. You can enter text in multiple languages by changing the language selection on the Map Settings form. |
The Connections tab is available for all hotspots.
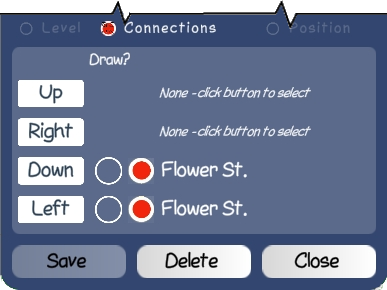
The Connections tab defines connections between hotspots. A connection allows a player to move from one hotspot to another by going up, down, left, or right. To define a connection in a direction, click the appropriate button. The Editor pops up the Hotspot Selection form showing all hotspots in the map. Click on the desired hotspot to connect it to the active one.
The Position tab is available for all hotspots.
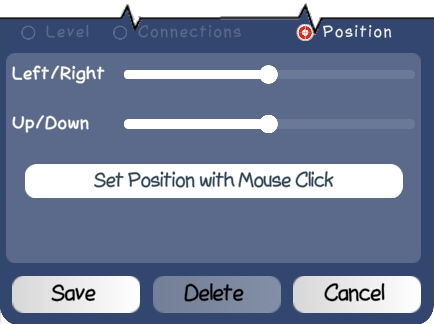
The Position tab allows you to adjust the position of a hotspot if the mouse click did not place it exactly where you wanted it. There are two ways to adjust the position: